
Decoupage-tekniken är populär – enkla instruktioner, tips och idéer för nybörjare

Decoupage-tekniken har blivit populär igen, och det med rätta. Den kombinerar målning, bildkonst och möbelrenovering på ett sätt som gör varje projekt unikt. Rätt utförd ser decoupageytan handmålad ut eller till och med som en del av möbeln.

I denna guide lär du dig:
- vad decoupage-tekniken är
- varifrån det har sitt ursprung
- hur decoupage görs steg för steg
- tips för ett lyckat resultat
- vilka material du behöver
Artikeln passar både nybörjare och mer erfarna som vill finslipa slutresultatet.

Vad är decoupage-tekniken?
Decoupage betyder att fästa papper med mönster på en målad eller behandlad yta så att resultatet ser ut som en del av ytan. Tekniken bygger på lager, toningar och ytbehandling, inte bara på att limma fast en bild.
Just därför fungerar chalk paint-färger och decoupage utmärkt tillsammans. Lager på lager-målning, vaxer och olika ytbehandlingar ger ytan djup och livfullhet som är svår att uppnå med traditionella möbelfärger.

Kort historia om decoupage-tekniken
Découpage kommer från franska ordet découpeur, som betyder att skära ut. Teknikens rötter går dock mycket längre tillbaka än till Frankrike.
- I Kina användes pappersutskärningar redan på 1200-talet för att dekorera lådor, lyktor och fönster
- På 1600-talet gjorde Venedig i Italien tekniken synlig och populär i Europa
- I Europa utvecklades decoupage till en förfinad form av inredningskonst
- Idag är decoupage en kombination av tradition och modern DIY-inredning.

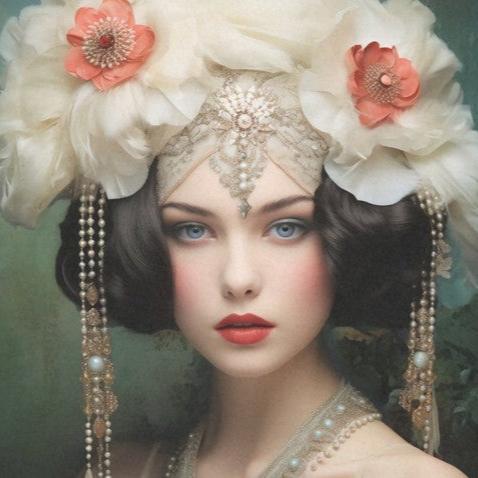
Vilka decoupage-ark används?
Decoupage-konstark är:
- tunna men hållbara
- lätta att tona in i ytan
- stora storlekar, typiskt cirka 43 x 58 cm
De passar särskilt bra för:
- till byråer och skåp
- till dörrar och lådor
- för mixed media-konstprojekt
- för återvinningsinredning
Mindre arkset för träning och små projekt finns också tillgängliga.

Decoupage steg för steg – enkla instruktioner
1. Förbered ytan noggrant
En ren och dammfri yta är grunden för framgång. Tvätta ytan och låt den torka.
2. Välj rätt bakgrundsfärg
- Helt täckande ark: en ljus bakgrundsfärg framhäver mönstret och återger arkets färger korrekt
- Delvis täckande: välj en färg som passar arket bakgrundston
- Till exempel: om arket är vitt eller ljust i tonen, ändras det när du fäster arket på en röd eller svart bakgrund. En vit bakgrund håller arkets färger nära originalet.
3. Jämna ut ytan
Måla ytan slät, slipa lätt och ta bort damm.
4. Placera decoupage-arket och jämna ut det lätt på ytan
- Applicera ett tunt lager avslutningsmedel och placera arket på en fuktig yta.
- Bästa verktyget för utjämning: Släta försiktigt med en plastpåse eller plastfolie.
- Undvik vassa verktyg för utjämning på grund av risken för rivning.
- En mjuk borstpensel är också bra för att jämna ut arket med lätt hand.
5. Använd endast det översta, mönstrade lagret
- Endast det översta, mönstrade papperslagret används från decoupage-arket om det finns flera lager.
- Frenchic decoupage-ark är enkla, så du behöver inte oroa dig för lagren.
- Om du använder till exempel tapet, blötlägg den först så lossnar lagren lättare.
6. Riv hellre än klipp
- Fukta penseln och dra längs mönstrets kant.
- Riv mjukt, så blir kanten naturlig.
- Riv även kanterna på arket om du använder hela
- De ursprungliga skarpa kanterna, klippta med sax eller kniv, är svåra att tona ut.
7. Torka och avsluta
Torka, (slipa lätt) och lägg på ett nytt lager avslutningsmedel. Upprepa vid behov 1–2 gånger.
Tips för ett extra vackert resultat
- Välj inte ett ljust ark till mörk grund
- Vit grund ger bäst färgframträdande
- Kanterna på bilden kan fortsättas med färg
- Flera nyanser, vax och krackeleringsmedel ger djup
Sprucken effekt får du med krackeleringsmedel: mörk grundfärg, krackelering, ljus ytfärg.
Decoupage i liten och stor skala
Decoupage passar för:
- till små inredningsföremål
- till stora möbler
- till tavlor och ramar
- för återvinningsinredning
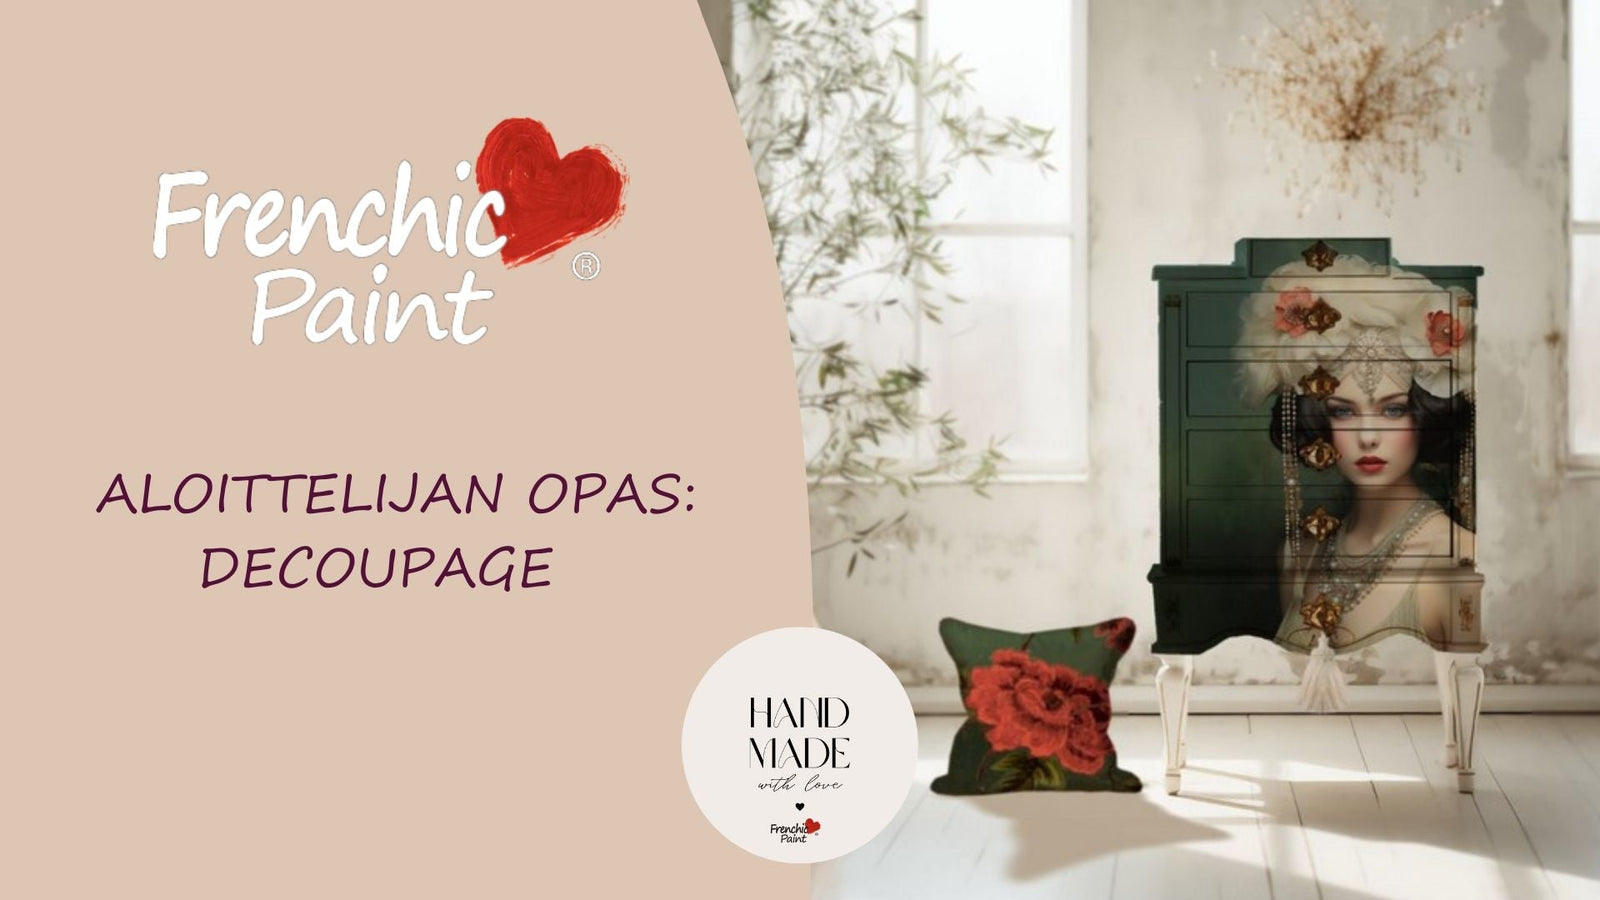
En tavla gjord på en gammal ram är ett enkelt sätt att prova tekniken.
Material för decoupage-projekt
- Decoupage-ark
- Penslar
- Hårtork
- Plastpåse eller plastfolie
- Slipverktyg
- Rengöringsmedel
- Avslutningsmedel
- Vax och krackeleringsmedel (valfritt)
- Vit grundfärg
Varför ska man prova decoupage-tekniken?
Decoupage-tekniken ger möjlighet att skapa helt unika ytor. Den kombinerar målning, bildkonst och möbelrenovering på ett sätt som passar både nybörjare och erfarna.
När du behärskar grundarbetet och avslutningen ser resultatet handmålat ut och håller över tid.

Lägg till någon speciell detalj och våga prova effekter
- Prova Easy Crackle för att skapa en sprucken yta. Måla först med en mörk nyans, tillsätt Easy Crackle och avsluta med en ljus färg, lägg på arket – resultatet blir en fantastisk åldrad yta.
- Placering och fastsättning av arket på byrån: Arket placeras som tapet och skärs upp vid lådans skarvar när det är torrt. Handtagen tas bort före fastsättning.
- Måla och avsluta med brunt vax om du vill ha en patinerad yta
- Vitt vax ger en vacker slöja på ytan och jämnar ut nyanserna
- Lägg till metalliska nyanser
- Lägg till nyanser och tona kanterna. Du kan fortsätta bilden med färg.
Decoupage länkar och mer information
Undvik de vanligaste misstagen - Decoupage
Bästa grundfärgerna - Decoupage
Se videon hur en gammal byrå blir ett fantastiskt konstverk med hjälp av decoupage-ark: