
MÅLNINGSTIPS FÖR KÖKSSKÅP - Ny look till ditt kök i Frenchic-stil!
Målning av köksskåp är alltid ett bra alternativ för den miljömedvetna konsumenten.
Förändringen som uppnås genom målning är stor och samtidigt sparar du tid och nerver från ofta långa och dyra renoveringsbesvär.
Målning av skåp ger det gamla köket extra tid
Målning är ett enkelt sätt att förnya hela kökets utseende billigt, det ger extra tid för det gamla köket och fräschar upp gulnade eller mörka ytor hemma eller i stugan.
Läs dessa tips till slutet och se "före och efter"-bilder från köksförnyelseprojekt.
Ofta är stommarna i gamla kök helt i gott skick - det är bara dörrarna som har gulnat eller på annat sätt ser ut att höra till en annan tid!


Köksmålning kan också göras med dörrarna på plats. Droppfri Frenchic är behaglig att måla med. Färgen på bilderna är Olivia från Al Fresco-serien.
Måla köksskåpen själv och spara - Man behöver inte alltid köpa nytt
Bara genom att måla dörrarna och välja en ny nyans kan du enkelt ge det gamla köket ett modernt utseende.
Den dryga Frenchic är ditt val! För målning av ett vanligt köksskåp räcker 2-3 x 750ml Frenchic färg - jämför priset på färgburken med nya dörrar.

Köket målat med Smudge nyans från Al Fresco-serien.
Att måla kök själv är vanligare än du tror!
Frenchic-seriens färger har blivit mycket populära i England och målningsboomen för kök pågår just tack vare Frenchic-seriens färgers nya egenskaper.
Våra kunder har förälskat sig i Frenchic-färgernas matta yta samt det jämna och hållbara slutresultatet.
Läs här också våra kunders erfarenheter och feedback om Frenchic-serien.
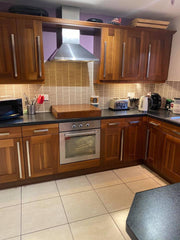
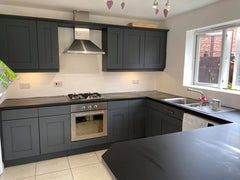
Bild: Skåpdörrar i Smudge-nyans och kakel i Dazzle Me!-nyans i stänkskyddet
Är ditt kök så gammalt och slitet att du tänker att målning inte är ett alternativ?
Du kan bli överraskad när du bekantar dig med våra kunders olika Frenchic-projekt: du hittar troligen exempel på ett kök mycket likt ditt eget i våra kunders bilder i FB-gruppen!
Du kan jämföra bilder och alternativ, planera användningen av nyanser. Tänk om du vågar prova pudriga gröna, blå eller rosa! Hur skulle ett supertrendigt tvåfärgat kök se ut?
Frenchic-seriens mattfärgade nyanser är mjuka inredningsfärger som passar vackert i många hem.

Köksdörrarna på bilden är målade i pastelligaLittle Duckle nyansen, från Al Fresco-serien.
Det är lätt att jämföra resultatet från våra kunders bilder på FB-sidorna, om du bara målar dörrarna och lämnar stommarna omålade.
Målningsstilen kan vara att måla dörrarna på plats eller avtagna, eller att måla endast utsidan av dörrarna – även för dessa finns användbara bildserier.
Du hittar säkert ett liknande kök i gruppen som ditt eget!
I gruppen hittar du hundratals bilder och bildserier från våra kunder, före- och efterbilder av kök, så Frenchic-gruppen är en trevlig plats att börja planera.
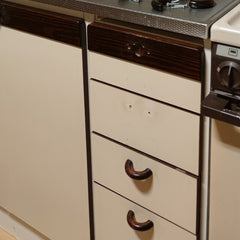

Bild: före och efter. Nyans:Wise Old Sage, Al Fresco
Avsätt tid för köksmålningsprojektet
När du målar hemma kan du ta din egen takt och måla kanske bara en dörr i taget!
Målningshelgen med vänner är ett snabbt sätt att få allt klart på en gång. Välj en stil och metod som passar dig.
Avsätt också tid för färgens torkning enligt instruktionerna.
Du kan måla trä eller MDF-yta
Du kan måla många olika ytor: trädörrar, spånskivor eller MDF-foliedörrar. Lär dig mer här om målning av laminatyta.
Ibland är plastfilmen på dörrarna redan skrynklig och att ta bort den kan vara ett bra alternativ före målning. Att ta bort filmerna går ofta med värme, ofta bara med en hårtork.
Tips!
Om du väljer att ta bort plastfilmen från möbler eller köksskåp slipper du slipa och tvätta ytorna. Slipa eller tvätta dock inte (tvätt lyfter MDF-fibrerna) bar MDF-skiva utan lämpligt skydd. Ren MDF avger skadliga ämnen.
Behandla bar skivyta medFinishing Coat före målning, så tätas den porösa skivan och du sparar på färgmängden.
Oavsett vilken yta du målar är förberedelserna alltid desamma:
Noggrann rengöring av ytor från köksfett och damm.
Lagningar och spackling om du till exempel byter handtag till nya.
Ytans uppruggnad. (slipa inte bar MDF-skiva)
Målning, minst två gånger, beroende på nyansskillnader och vald färg.
48h torktid, försiktig användning under tre veckors härdningstid.
Öva först i miniatyr.
Om du inte tidigare målat med Frenchic-serien, gör först ett testmåleri – du kan till exempel skaffa ett gammalt litet skåp eller nattduksbord med dörr och låda, i miniatyr som i ditt kök.
Gör alla förberedelser på testbiten som du skulle göra i ditt kök: tvätta och rugga upp. Prova olika penslar och rollers, olika målningsmetoder.
I detta lilla projekt ser du enkelt slutresultatet på ytan med de målningsverktyg du valt.

Bild: Dusky Blush & City Slicker, Al Fresco


Bild: Skåpsdörrar Swankypants, Al Fresco, kakel i stänkskyddet Dazzle Me!
Börja med att välja en nyans till köket och testa lugnt hemma hos dig.
Välj en Frenchic Paint-färg eller några av dina favoriter och måla ett test på skåpsdörren, en lös dörr eller någon diskret plats.
Så får du omedelbart en bra uppfattning om färgens täckförmåga och kan samtidigt bedöma färgförbrukningen.
Du kan också undersöka dina valda nyanser i ditt eget hems ljus och skugga - och på så sätt säkerställa färgens korrekthet.
Visste du förresten att en nyans/färg ser annorlunda ut på en vertikal yta än på en horisontell yta!
På denna sida hittar du alla, över 100 färdiga nyanser bekvämt samlade!

Köket på bilden är målat med Cool Beans, i nyansen Al Fresco från serien.
En vanlig köksmålning utan stora nyansskillnader är klar med 2-3 lager
Färgförbrukningen påverkas av många faktorer: färgskillnaden mellan ytan som ska målas och den valda nyansen, använda målningsverktyg och teknik, oblandad färg och för tunna lager.
Följ därför instruktionerna för att få bästa möjliga resultat
Om nyansskillnaden är stor mellan ytan som ska målas och den valda färgen, eller om du vill måla en rödaktig träyta vit, kan det hända att du behöver fler lager än vanligt. Speciellt när du målar från vitt till svart eller tvärtom.
En orange, gulaktig, röd eller liknande yta bör målas med en grå nyans innan den slutliga ytan målas.
Färgers karaktär förändras beroende på belysning och intilliggande färg. Färgen återges också olika på horisontella och vertikala ytor. Därför är det värt att testa hemma!
Även utspädning av färgen påverkar täckförmågan, antalet lager och hållbarheten negativt.
Se till att du reserverar tillräckligt med färg för att slutföra projektet
Branschens normala standardråd är att om du behöver mer än en färgburk, se till att de är från samma batchnummer eller, om det inte är möjligt, blanda färgburkarna innan målning för att säkerställa ett enhetligt resultat. Observera också att en liten 250 ml och en stor 750 ml burk alltid är från olika batcher.
Bedöm nyansens korrekthet först när färgen är torr och efter två lager.


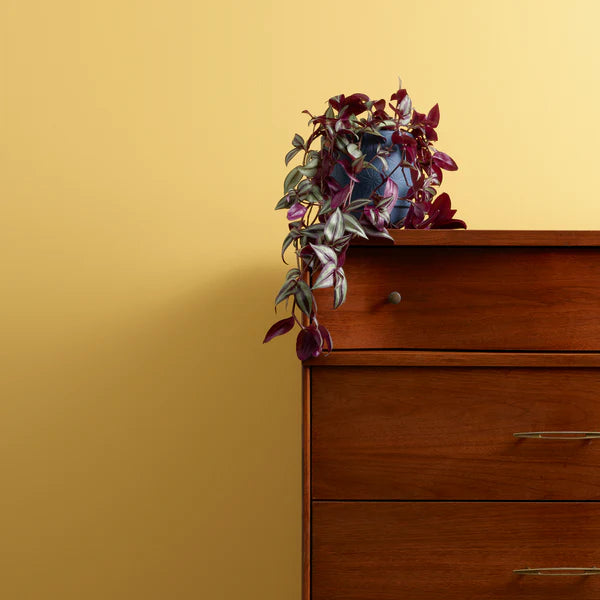
Gulnat vitt vackert igen med Olivia nyans.
Från mörkt till vitt eller tvärtom
Tips!
Måla första lagret med en grå nyans om din nya nyans skiljer sig mycket från underlaget. Den grå nyansen dämpar rödhet eller mörk ton och du kan klara dig med färre lager, t.ex. med vita lager.
Du kan välja en mellangrå nyans till exempel från Al Fresco-serien City Slicker eller Swankypants nyanser.
När du väljer färg är det bra att titta på Frenchic Paint-seriens egen FB-grupps inlägg, där hittar du troligen bilder på redan målade kök i den nyans du funderar på.
Gör en sökning i gruppens sökfält med färgens namn eller titta på alla markerade inlägg med rubriken: kök.
Här kan du läsa mer om färger och färgval.
Börja ditt målningsprojekt med att rengöra ytorna
Tvätta och skrubba de ytor som ska målas noggrant rena från all köksfett, smuts och damm. Detta steg är det viktigaste, rengöringen bör göras noggrant.
Rengör ALLT VERKLIGEN noga! Köksytor kan vara särskilt oljiga och feta oavsett hur rent du håller ditt kök. Rengör och rengör igen!
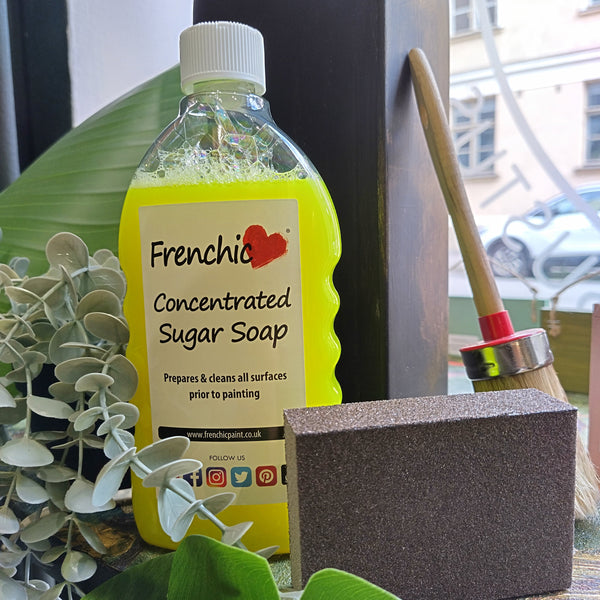
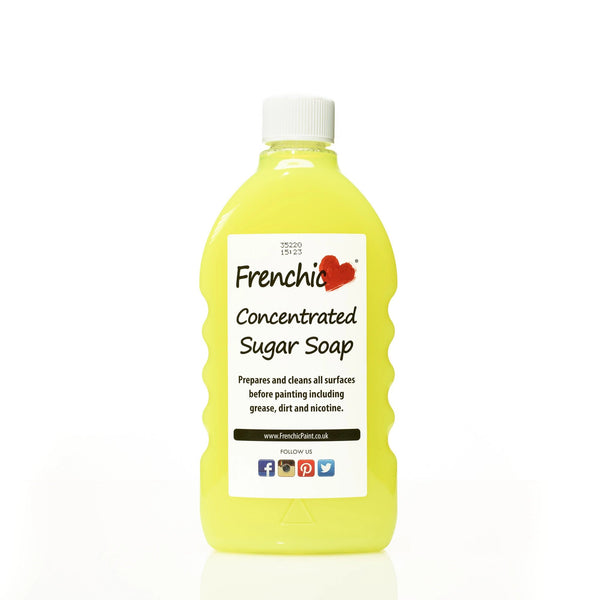
Sugar Soap är ett rengöringsmedel utvecklat för detta ändamål - färgrengöring, men oavsett vilket rengöringsmedel du använder, skölj ytorna slutligen med rent vatten och torka sedan ytorna.
Det här tvättsteget vill du inte hoppa över, det straffar sig senare när ditt projekt redan är långt framskridet. På en smutsig och fet yta sitter ingen färg kvar länge.
Inspektera den rena ytan - vill du spackla hål eller repor? Byter du ut handtagen? Ta bort knoppar och handtag. Spackla då de gamla fästpunkterna för handtagen.
Rugga upp ytan och börja måla
Torka bort slipdamm från skåpens yta och börja måla. Avsätt tid för projektet eller gör det i små delar enligt din egen tidtabell, en lucka i taget.
Du kan ta bort luckorna från plats, vilket kanske påskyndar målningsarbetet, eller måla luckorna på plats.
Tejpa dock gångjärnen och andra områden innan målning som du inte vill måla. Använd kvalitets tejp för avgränsningar.

Bild: Ovalpenslarna från Frenchic Paint-serien passar bra för målning av skåpsluckor.
Måla test - prova och testa också verktygen först
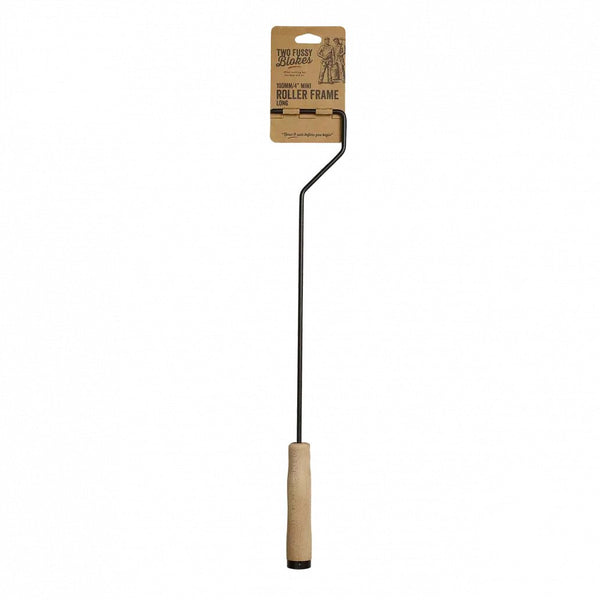
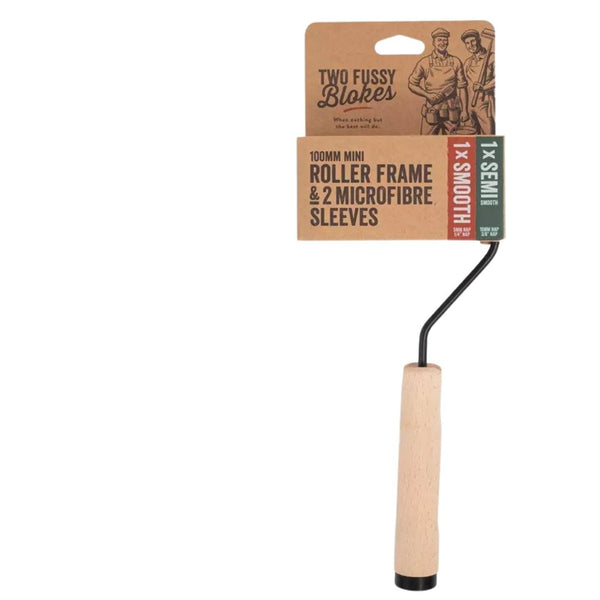
Om dina skåpsluckor har spår eller dekorativa speglar behöver du bra penslar: både en smal och en bred pensel. En smal roller är också ett snabbt och bra verktyg tillsammans med penslarna.
Prova verktygen innan du börjar med ett större projekt, så märker du vilket målningsverktyg som passar dig bäst.
Med högkvalitativa, rena och hela verktyg går målningen snabbt och resultatet blir vackert. Frenchic-seriens ovala penslar är handgjorda speciellt för chalk paint-typ av färg.
Du kan måla dörrarna med en liten spruta eller pensel – roller och pensel är en bra kombination.
Ta hand om dina penslar under målningsprojektet och tvätta dem alltid noggrant med varmt vatten efter avslutat arbete. Torka penslarna liggande eller med borststråna nedåt.
Med rena penslar blir målningsresultatet vackert. Läs mer om val av pensel här.
Överarbeta inte en fuktig målningsyta – låt lagret torka även om det inte blev perfekt och täckande – nästa lager rättar till det. Men måla alltid nästa lager på en helt torr yta. Även om du vill rätta till vissa ställen, ha tålamod och låt lagret torka först.
Om du av misstag målar ett färskt färglager igen kan det rulla sig ojämnt. Låt då lagret torka, slipa ytan jämn – torka bort dammet och fortsätt måla.

Bild: Dusky Blush, Al Fresco
Låt färgen torka i lugn och ro
Att följa torktiderna är viktigt och påverkar både färgens hållbarhet och förbrukning.
Läs instruktionerna på färgburken innan du börjar och följ målningsanvisningarna och torktiderna, även mellan färglagren.
Avslutningsvis, låt de målade ytorna torka i 48 timmar innan försiktig användning och kom ihåg att skyddsegenskaperna i färgen härdar ytterligare under tre veckor efter torkning. Fram till dess, var extra försiktig med ytorna.
Du kan alltså börja använda köket försiktigt efter 48 timmar. När färgen har nått sin slutliga hårdhet efter cirka tre veckor blir ytan mycket hållbar.

Bildens nyans: Dazzle Me! och Smudge, Al Fresco
Frenchic Paint jämnar ut sig vackert
Frenchic Paint har en speciell 'Self Levelling'-egenskap, ytan jämnas ut vackert under torktiden. Läs mer här.
Om du vill att målningsytan ska vara slät och fin, måla det sista lagret lätt med en roller eller en pensel doppad lätt i vatten. Med högkvalitativa färger och rena verktyg blir resultatet vackert. Låt färglagren torka helt innan nästa lager – ha tålamod med målningsprojektet.
Du kan behöva flera lager, särskilt om nyansskillnaden är stor mellan underlaget och den valda färgen.
Prova tekniker och verktyg först och välj sedan med vilka verktyg och stil du får det önskade resultatet.
Färgåtgång och täckförmåga påverkas väsentligt av nyansskillnad, noggrann omrörning av färgen före och under projektet samt att torktider följs även mellan lagren.

Färgen på köksskåpen på bilden är en dämpad blå Ol' Blue Eyes från Al Fresco-serien.
Vid målning med Al Fresco är torktiden mellan lager två timmar och med Lazy Range minst en timme.
Serier från Frenchic som passar för målning av köksskåp
- Lazy Range - vaxbaserad kalkfärg - matt yta, kräver inget annat skydd
- Al Fresco fukttålig kalkfärg - matt yta, kräver inget annat skydd
- Trim Paint, satinmatt, hållbar färg för lister och dörrar - satinblank, kräver inget annat skydd, endast i 500 ml burkstorlek
Om du väljer färg från någon av dessa tre serier för målning av köksskåp behöver du inget annat skydd, t.ex. vax eller lack, ovanpå färgen. Färgytan blir hållbar som den är, så länge färgen får torka och härda i lugn och ro enligt instruktionerna.
Extra skydd kan vid behov appliceras från Viimeistelypinnoitteet på ytor med hård slitage.
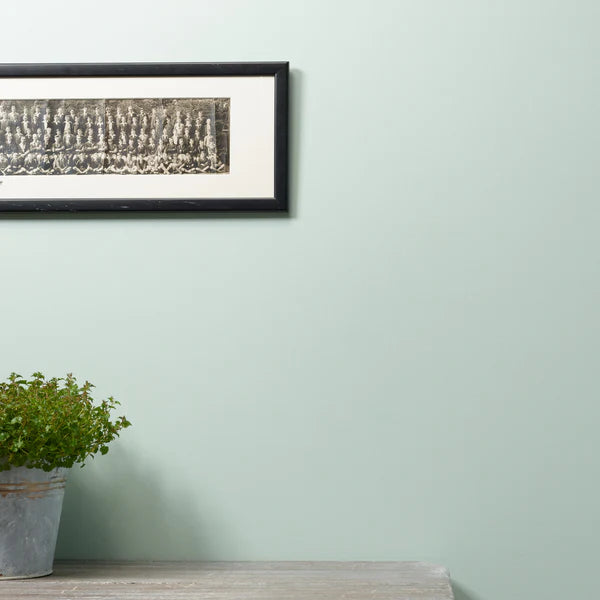
En ny, fräsch nyans för köksväggarna
Tvättbar och hållbar Frenchic Paint för väggar passar i köket. Läs mer här.

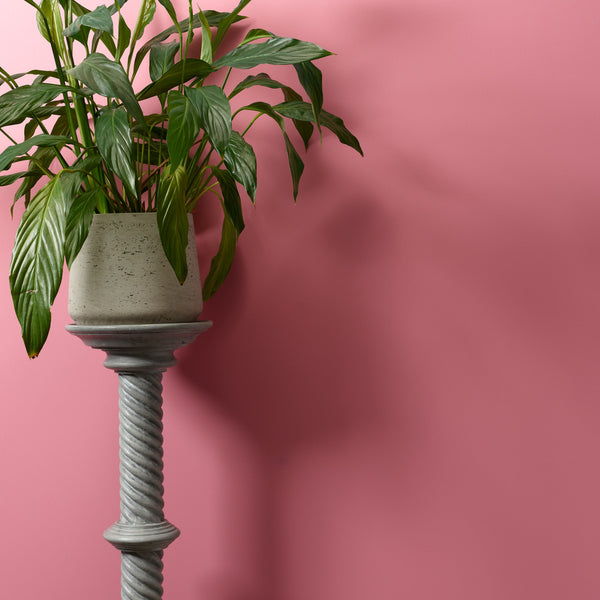
Köksväggen på bilden är målad med siniharmaalla Gentlemen's Club sävyllä.
Extra skydd för ytor med hård slitage - köksbänkar
När du funderar på behovet av extra skydd för målade ytor är det bäst att vara realistisk.
Du vet bäst själv vilken typ av slitage just ditt kök utsätts för.
Hård användning betyder inte att du inte kan måla möbler.
Generellt tål alla färgytor dåligt starka rengöringsmedel, desinfektionsmedel, slipande rengöringsredskap, husdjursklor och mekaniska repor eller skrapmärken.
Färgytor tål inte direkt skärning på ytan eller ugnsvarma kärl utan lämpligt skydd, som skärbrädor och grytunderlägg.
Målning av köksbänkar och köksbordsskivor
Vi rekommenderar inte målning av köksbänkar. Dock har våra kunder målat köksbänkar och köksbordsskivor. Vissa projekt lyckas, andra inte.
Tänk efter innan du bestämmer dig för målning hur just er familj använder och rengör bänkskivorna.
Färgytan tål inte till exempel att skära direkt på ytan eller heta kärl.
För målade bänkskivor och köksbordsskivor rekommenderas Tuff Top Coat-beläggning enligt anvisningarna.
Frenchic-serien har två olika finishbeläggningar som båda passar perfekt för att avsluta köksskåp och ger en fukt- och slitstark yta, antingen matt eller blank.
Om du bestämmer dig för att lägga ett lager av till exempel matt finishbeläggning ovanpå färgen, vänta dock minst ett par dagar, minst 48 timmar, så att färgen har börjat torka.
Appliceringen av beläggningen är enkel och snabb – du kan till exempel göra det endast på underskåpen.
Läs arbetsinstruktionerna i produktinformationen för den finish du valt och följ torktider och antal lager.
Båda finishbeläggningarna är lösningsmedelsfria, lätta att applicera och torkar snabbt.
Finishing Coat - Blank beläggning
Du kan lägga till lager av Finishing Coat på den målade ytan enligt anvisningarna om du vill ha mer glans. Finishing Coat appliceras bäst med en svamp.
Tuff Top Coat - Matt beläggning
Den nya 'Tuff Top Coat' är en matt finishbeläggning som tål lite värme och passar för att ge extra skydd på hårt utsatta målade köksbänkar, köksbordsskivor, golvytor samt köksskåp.
Om du älskar våra mattmålade färger men vill ha extra skydd och slitstyrka, använd TTC:t', så behöver du inte kompromissa med den fantastiska mattan!
Frenchic Paint-seriens färger är matta - hållbara och tvättbara
Endast Trim Paint-seriens färger har en vacker, matt satinfinish. Trim Paint är ett utmärkt val för köksskåp.

Köket på bilden är målat med blågrå Genlemen's Club nyans, från Trim Paint-serien.
Ta väl hand om dina målade möbler och köksluckor och torka dem endast med milda rengöringsmedel. Undvik starka rengöringsmedel, ångtvätt och repande svampar eller borstar vid fläckborttagning.
Läs mer om skötsel av målad yta här.
Inget vax i köket
Vi rekommenderar inte självutjämnande vaxlager på köksskåp eller bardiskar eftersom vaxyta slits vid användning och löses upp av alkohol och lösningsmedelsbaserade rengöringsmedel.
Vi rekommenderar Finishing Coat-lager istället för vax på ytor med hård slitage och som är utsatta för stänk, eller om du vill ha glans på matt färg.
Frenchic Paint Original-seriens färger rekommenderas inte för köksbänkar utan Tuff Top Coat-beläggning.
Val av färg och förbrukning vid målning av köksskåp
Färgförbrukningen beror på många faktorer, men ofta räcker 2 x 750 ml även till ett stort kök oavsett serie.

Skaffa en liten 250 ml burk för testning
Om du målar en mörk yta vit eller tvärtom kan färgförbrukningen vara större än vanligt på grund av stor färgskillnad. Avsätt då en grå nyans för första lagret.
Faktorer som påverkar förbrukningen är bland annat noggrann omrörning av färgen, att torktider mellan lager följs, färgskillnad mellan underlaget och vald nyans, målningsverktyg och målningsmetod.
Tänk på om du också ska måla dörrarna och stommarna på insidan. Och skåpsidorna och listerna?
Vid sprutmålning är färgförbrukningen normalt högre.
Testa innan ett större projekt
Vi rekommenderar testmålning för att du ska bli bekant med färgen och verktygen innan ett större projekt.
Penslar, avgränsningstejp och rengöringsmedel.
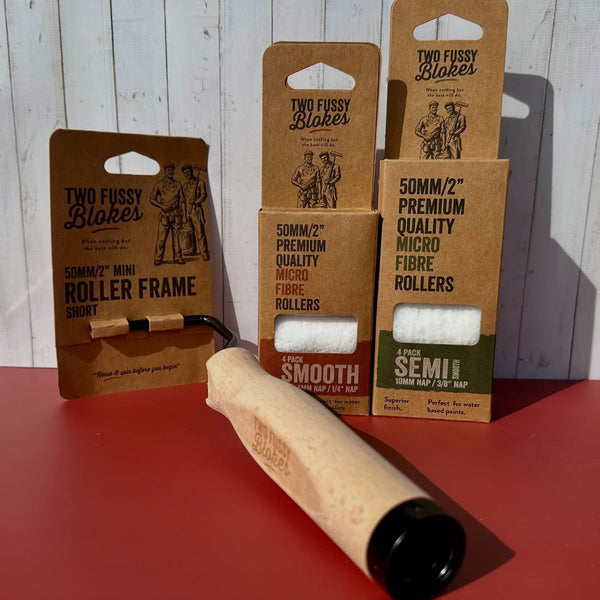
Verktyg:
Målningsarbetet kan göras med pensel eller roller - ofta är båda bra att ha.
Rengöringsmedel:
Du behöver också ett effektivt fettlösande rengöringsmedel, till exempel Sugar Soap och en slip-svamp om du ruggar ytorna för hand.
Avgränsningstejp:
Kvalitetstejp om skåpen har glasdörrar och du vill avgränsa kanter eller lister.
Om du inte byterhandtag, behöver du inget annat!
Frenchic färgers täckförmåga:
Al Fresco, Trim Paint och Lazy Range färgernas täckförmåga är cirka 12m2 / 750ml.
Chalk Wall Paint's 36m2 / 2,5L.
Alla färger i Frenchic-serien passar också för sprutmålning av köksskåp.
Ta en titt på våra kunders fantastiska bilder av genomförda målningprojekt för köksskåp, så får du bra idéer till ditt eget arbete!
Planera ditt projekts genomförandetid och lugn torktid.
Bjud in vänner till målningsinsatsen - det är roligt att göra tillsammans!

Bildens nyans: Duckling, Al Fresco
Bilder på våra kunders köksförändringar och olika färgkombinationer hittar du i vår FB-grupp.
Se här en målning video med finsk text om hur du kan måla köksskåpsdörrar med pensel eller spruta!